
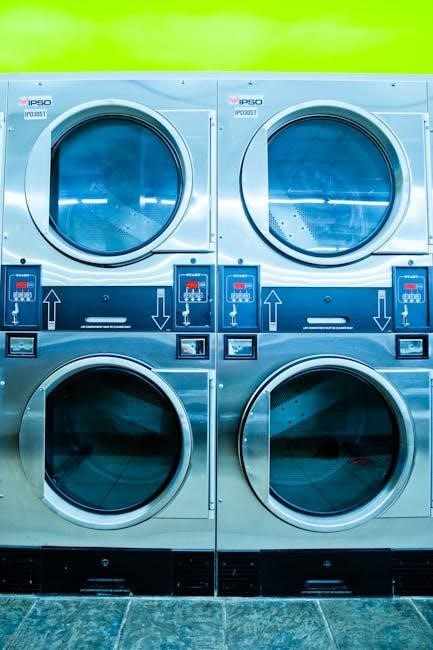
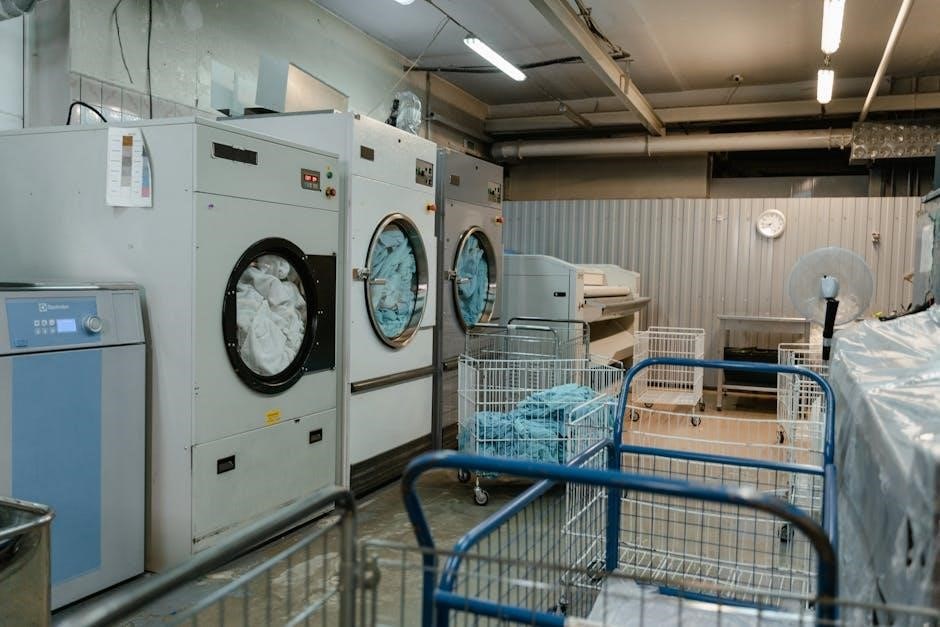
ge stackable washer dryer repair manual
GE Stackable Washer Dryer Repair Manual: Article Plan
This comprehensive guide details troubleshooting, repair, and maintenance for GE stackable units. It covers common issues, safety, tools, and component replacement. Expert advice and diagrams are included for successful fixes!
GE stackable washer dryer combinations offer a space-saving laundry solution, popular in apartments and smaller homes. These units integrate a washing machine and dryer vertically, maximizing utility in limited areas. However, like any appliance, they require occasional maintenance and repair. Understanding the intricacies of these systems is crucial for effective troubleshooting and extending their lifespan.
This guide focuses on diagnosing and resolving common issues encountered with GE stackable models. We’ll explore the unique challenges presented by their integrated design, covering both washer and dryer components. Proper repair not only restores functionality but also ensures safety and prevents further damage. Before attempting any repairs, always prioritize safety precautions and consult relevant service manuals. This manual will empower you to tackle repairs confidently, saving time and money.
Understanding Common GE Stackable Washer Dryer Issues
GE stackable units, while convenient, exhibit specific failure patterns. Washer problems frequently involve drainage issues, failing to spin, leaks, or getting stuck during the rinse cycle. These often stem from a clogged drain pump, worn belts, or faulty water inlet valves. Dryer malfunctions typically manifest as a lack of heat, failure to tumble, or unusual noises during operation. Common culprits include a burned-out heating element, a broken drive belt, or worn drum rollers.
Control panel errors are also prevalent, potentially locking out functions or displaying incorrect codes. Electrical issues, though less frequent, can arise from faulty wiring or a failing timer/control board. Identifying the precise issue is the first step towards effective repair. This guide will detail how to diagnose these problems systematically, utilizing troubleshooting techniques and component testing to pinpoint the root cause.
Safety Precautions Before Repair
Prioritize safety when repairing your GE stackable washer dryer! Always disconnect the appliance from the power supply – unplug it from the electrical outlet. Turn off both the water supply valves to the washer to prevent flooding during component removal. Be mindful of sharp edges within the appliance’s casing; wear work gloves for protection. Avoid working with wet hands or in damp environments to minimize electrical shock risk.
Gas dryers require extra caution; shut off the gas supply valve before any work begins. Proper ventilation is crucial when dealing with refrigerant lines in some models. Never attempt repairs you are uncomfortable with; consult a qualified technician. Dispose of old parts responsibly, following local regulations. Remember, safety is paramount – a cautious approach prevents injuries and ensures a successful repair.
Tools Required for GE Stackable Washer Dryer Repair
Essential tools for GE stackable washer dryer repair include a screwdriver set (Phillips and flathead), pliers, and an adjustable wrench. A multimeter is crucial for testing electrical components like heating elements and continuity. Socket sets and wrenches are needed for disassembling various parts. A nut driver set simplifies removing specific fasteners. A voltage tester confirms power is off before working on electrical connections.
Specialty tools like a drain pump pliers and a belt removal tool can be incredibly helpful. A shop vacuum cleans up debris during the repair process. Gloves protect your hands, and safety glasses shield your eyes. A digital camera documents disassembly for reassembly reference. Having these tools readily available streamlines the repair, saving time and frustration. Consider a parts retrieval magnet for dropped screws!
Locating the Model Number
Finding your GE stackable washer dryer’s model number is the first step towards successful repair. This unique identifier unlocks access to specific service manuals, parts diagrams, and troubleshooting guides. Typically, the model number is located on a label affixed to the unit. For washer-dryer combos, check inside the washer door jamb or on the back panel.
For stacked units, the label is often found on the side of the washer or dryer cabinet, visible when the units are separated. The label usually features “Model Number” followed by a series of alphanumeric characters. Record this number accurately, as even a single digit error can lead to incorrect parts ordering. Having the serial number handy is also beneficial when contacting GE customer support or ordering parts.
Accessing Service Manuals and Diagrams
Once you have your GE stackable washer dryer’s model number, accessing service manuals and diagrams becomes significantly easier. GE does not always freely provide detailed service manuals to the public, but several resources exist. Online parts retailers often offer downloadable diagrams illustrating component locations and disassembly procedures. Websites specializing in appliance repair frequently host user-uploaded manuals and troubleshooting guides.
Searching online using your specific model number combined with terms like “service manual” or “parts diagram” yields relevant results. Paid subscription services offer comprehensive libraries of appliance repair documentation. These resources are invaluable for understanding the internal workings of your machine and performing repairs safely and effectively. Remember to verify the diagram matches your exact model for accuracy.

Washer Repair – Common Problems
Frequent washer issues include failure to drain, spin, fill, or leaks. Rinse cycle problems and a stuck machine are also common; diagnosis is key!
Washer Not Draining
A washer failing to drain is a common issue, often stemming from a clogged drain pump. First, check the drain hose for kinks or obstructions – ensure it isn’t excessively bent or blocked with lint. Next, inspect the pump filter, typically located at the front of the machine, for debris like coins, buttons, or socks. Carefully remove and clean the filter, ensuring no foreign objects remain.
If the hose and filter are clear, the drain pump itself may be faulty and require replacement. Accessing the pump usually involves removing the front or back panel of the washer. Before replacing, test the pump for continuity with a multimeter to confirm it’s receiving power. A non-responsive pump indicates a need for a new component. Remember safety first – disconnect power before any repair work!
Occasionally, a blocked tub drain outlet can also cause draining issues. Inspect this area for obstructions as well.
Washer Not Spinning
A washer refusing to spin can be frustrating, often linked to issues with the drive belt, motor coupling, or lid switch. Initially, verify the lid switch is functioning correctly; the washer won’t spin if it thinks the lid is open. Inspect the belt (if applicable to your model) for wear, breakage, or slippage – a damaged belt needs replacement. Accessing the belt typically requires removing the back panel.
If the belt is intact, the motor coupling might be the culprit, especially if you hear a clicking sound during the spin cycle. This coupling connects the motor to the transmission and can wear out over time. A faulty motor is less common but possible; testing it requires a multimeter to check for continuity.
Ensure the load is balanced; an uneven load can prevent spinning. Always disconnect power before any internal inspection or repair.
Washer Leaking Water
Water leaks from a GE stackable washer can stem from several sources, demanding careful investigation. Common culprits include loose hoses, a damaged water inlet valve, a faulty drain pump, or a deteriorated door boot/gasket. Begin by inspecting all hose connections (water supply and drain hose) for tightness and cracks; replace any damaged hoses immediately.
The water inlet valve controls water flow; if it fails, it may leak even when the washer is off. Check the drain pump for cracks or leaks, particularly around the pump housing and seals. A worn or torn door boot (gasket) is a frequent cause of leaks during the wash cycle – examine it closely for damage.
Remember to disconnect power before inspecting internal components. Small leaks can sometimes be traced to soap dispenser overflows; ensure proper detergent usage.
Washer Not Filling with Water
A GE stackable washer failing to fill typically points to issues with the water supply, inlet valve, or control board. First, verify the water supply valves are fully open and the water pressure is adequate. Next, inspect the water inlet valve itself; this valve controls water flow into the washer. A faulty valve may be clogged or electrically defective, preventing water entry.
Use a multimeter to test the valve’s solenoid for continuity – a lack of continuity indicates a failed valve needing replacement. Also, check the water inlet screen for obstructions like sediment or debris, which can restrict water flow. If the valve and screen are clear, the issue might lie with the control board, which sends signals to the inlet valve.
Always disconnect power before any electrical testing or component replacement.
Washer Stuck on Rinse Cycle
If your GE stackable washer is perpetually stuck on the rinse cycle, the problem often stems from a malfunctioning lid switch, a faulty control board, or an issue with the drain pump. The lid switch ensures the washer operates only when the lid is closed; a defective switch might not signal the machine to advance. Inspect the switch for damage or proper functionality using a multimeter.
A failing control board can also cause this issue, as it governs the entire wash cycle. Testing the control board requires specialized knowledge and may necessitate professional assistance. Finally, a partially clogged or failing drain pump can prevent the washer from moving past the rinse cycle, as it cannot properly drain the water.
Ensure the drain hose isn’t kinked or obstructed before investigating the pump itself.
Replacing the Washer Drain Pump
Replacing the washer drain pump typically involves disconnecting power, accessing the pump (often from the rear or bottom panel), and detaching hoses and electrical connectors. Before starting, carefully note the hose and wire configurations for correct reassembly. Disconnect the drain hose and any electrical connections, then unbolt the old pump.
Install the new pump, ensuring a tight seal with the mounting bolts and secure hose connections. Double-check all electrical connectors are firmly attached. Before restoring power, manually rotate the pump impeller to confirm free movement. Reassemble the access panels and test the washer to verify proper draining.
Always use the correct replacement pump specified for your GE model to ensure compatibility and optimal performance.

Dryer Repair – Common Problems
Common dryer issues include no heat, failure to tumble, loud noises, and mid-cycle shutdowns. Troubleshooting these problems often involves checking heating elements, belts, and motors.
Dryer Not Heating
A dryer failing to heat is a frequent complaint, often stemming from a faulty heating element, a malfunctioning thermostat, or a blown thermal fuse. Begin by verifying the power supply to the dryer; a tripped breaker or loose connection can prevent operation. Next, carefully inspect the heating element for breaks or damage – a visual inspection often reveals the issue.
The thermal fuse, a safety device, should be tested for continuity using a multimeter; if blown, it indicates an overheating problem that needs addressing before replacement. Similarly, check the thermostat, as it regulates the dryer’s temperature. A defective thermostat won’t signal the heating element to activate. Remember to disconnect power before any inspection or repair. Replacing these components is usually straightforward, but always consult a service manual for your specific GE model.
Dryer Not Tumbling
If your GE stackable dryer isn’t tumbling, the most common culprit is a broken drive belt. This belt connects the motor to the drum, and a snap or wear can cause it to break or slip off. Before inspecting, disconnect the power! Accessing the belt usually requires removing the front or rear panel of the dryer.
Once accessible, check the belt’s condition and proper placement around the drum and motor pulley. A worn or cracked belt needs replacement. Also, examine the motor pulley and drum rollers for damage or obstruction; these can prevent smooth rotation. Less frequently, the motor itself may be failing. Testing the motor requires a multimeter and some electrical knowledge; if unsure, consult a professional. Ensure the dryer isn’t overloaded, as this can strain the motor and belt.
Dryer Making Loud Noises
Unusual noises from your GE stackable dryer often indicate mechanical issues. Squealing sounds frequently point to worn drum rollers or a failing idler pulley – these support the drum’s rotation. Thumping noises can suggest unbalanced loads or worn-out drum support rollers. Grinding sounds are more serious, potentially indicating a failing drum support or motor bearings.
To diagnose, disconnect power and access the dryer’s interior. Inspect the rollers and idler pulley for wear, cracks, or resistance to movement; Rotate the drum by hand, listening for noises and feeling for roughness. A failing motor bearing will often produce a consistent grinding sound. Loose objects caught inside the dryer can also cause rattling. Regular maintenance, like cleaning the lint trap and inspecting rollers, can prevent many noise issues.
Dryer Shutting Off Mid-Cycle
A GE stackable dryer stopping during a cycle is frustrating, often signaling electrical or thermal issues. The most common cause is overheating, triggered by a clogged vent or a faulty thermal fuse. A blocked vent restricts airflow, causing the dryer to overheat and automatically shut down as a safety measure. Thermal fuses are designed to blow and interrupt the circuit if excessive heat is detected.
Begin troubleshooting by checking the vent for obstructions – lint buildup is typical. If the vent is clear, test the thermal fuse for continuity using a multimeter; a lack of continuity indicates a blown fuse. Other potential causes include a failing door switch (preventing proper operation) or a malfunctioning control board. Always disconnect power before inspecting internal components. Replacing a thermal fuse is relatively simple, but control board issues may require professional assistance.
Replacing the Dryer Heating Element
A faulty heating element is a frequent cause of a dryer not heating. Replacing it involves several steps, prioritizing safety first – always disconnect power! Accessing the element typically requires removing the dryer’s front panel and potentially some internal components. Carefully disconnect the wires connected to the old element, noting their positions for correct reassembly.
Before installing the new element, inspect the element housing for any obstructions or damage. Ensure the new element is the correct replacement for your specific GE model. Securely attach the new element, reconnecting the wires precisely as they were before. Double-check all connections before reassembling the dryer. Testing the dryer after replacement is crucial to confirm proper function. If the dryer still doesn’t heat, investigate other potential issues like the thermostat or control board.
Replacing the Dryer Belt
A broken dryer belt prevents the drum from tumbling, halting the drying process. Replacing it requires accessing the drum, usually by removing the front or top panel of the dryer. Locate the belt around the drum and motor pulley; it may be snapped or off track. Release tension on the idler pulley to ease belt removal – this often involves a lever or screw.
Install the new belt, ensuring it’s correctly seated around the drum and motor pulley. Re-engage the idler pulley, securing it in place. Verify the belt’s proper alignment and tension before reassembling the dryer. A loose belt can slip and cause noise, while an overly tight belt can damage components. Always double-check your work and test the dryer after reassembly to confirm proper tumbling action. Refer to your model’s diagram for specific routing.

Specific Component Repair & Replacement
This section details procedures for replacing key parts like control panels, motors, pumps, timers, and gaskets. Detailed instructions ensure accurate repairs!
Control Panel Troubleshooting & Repair
The control panel is the brain of your GE stackable unit, and issues here can manifest in various ways – unresponsive buttons, error codes, or complete failure. Begin by visually inspecting the panel for any physical damage, like cracked buttons or a damaged display. Next, check the power supply to the control board, ensuring it’s receiving the correct voltage. Often, a faulty door switch can prevent the machine from starting, mimicking a control panel problem.
To access the control panel for deeper troubleshooting, you’ll typically need to place the unit in service position (refer to the dedicated section). Carefully disconnect the wiring harness and inspect connectors for corrosion or loose connections. Using a multimeter, test the continuity of the control board components. If the board is faulty, replacement is usually the most practical solution. Always remember to disconnect power before working on electrical components!

Motor Replacement (Washer & Dryer)
Replacing the motor in either the washer or dryer requires careful disconnection of wiring and physical removal of the old component. For the washer, access usually involves removing the front or rear panel, depending on the model. The dryer motor is often located near the blower wheel and requires disassembly of the dryer housing. Before disconnecting anything, photograph the wiring configuration for easy reassembly.
Once disconnected, the motor can be removed by unscrewing mounting bolts or releasing retaining clips. When installing the new motor, ensure it’s the correct replacement part for your specific model number. Carefully reconnect all wiring, matching the original configuration. Test the motor’s operation before fully reassembling the unit. Remember to always disconnect power before beginning any motor replacement procedure for safety!
Pump Replacement (Washer)
The washer’s drain pump is crucial for removing water after each cycle; a faulty pump causes draining issues. Replacement typically involves accessing the pump from the washer’s base or rear panel, requiring unit tilting or removal. Disconnect power before starting! Locate the pump, noting hose and electrical connections – photographs are helpful.
Loosen hose clamps and carefully detach the hoses. Disconnect the wiring harness, then unbolt the pump from its mounting bracket. Install the new pump, ensuring a secure fit and proper hose connections. Reconnect the wiring harness, matching the original configuration. Test the pump by running a short drain cycle to verify functionality and check for leaks. Proper sealing of hose connections is vital to prevent future water damage.
Timer/Control Board Issues
The timer or control board orchestrates the washer/dryer’s cycles; malfunctions lead to erratic behavior or complete failure. Diagnosing these issues often requires a multimeter to test for voltage and continuity. Symptoms include cycles not starting, stopping prematurely, or incorrect operation. Accessing the board usually involves removing the control panel and potentially the cabinet.
Before handling, disconnect power! Carefully inspect the board for burnt components or damaged connectors. Replacement is often necessary if the board is faulty. Ensure the new board is compatible with your model number. Reconnect all wiring harnesses precisely as they were originally connected. Testing involves running through various cycles to confirm proper functionality. Static discharge precautions are crucial when handling electronic components.
Gasket Replacement (Washer)
A worn or damaged washer door gasket causes leaks during operation, potentially damaging floors and components. Signs of a failing gasket include visible cracks, tears, or mildew buildup. Replacement requires careful removal of the old gasket, often involving prying and gentle manipulation. Ensure the new gasket is the correct size and type for your GE model.
Before starting, disconnect power and water supply. Clean the door rim thoroughly to ensure a good seal. Install the new gasket, carefully stretching it into place, working around the entire door perimeter; Verify a tight fit, ensuring no gaps or wrinkles exist. Run a test cycle to check for leaks and confirm proper sealing. Proper installation prevents water damage and maintains washer efficiency.
Service Position Access & Usage
Accessing the service position on a GE stackable washer/dryer unlocks advanced diagnostic and testing capabilities; This mode allows direct control over components like the washer controls, dryer start switch, and timer. Typically, it involves manipulating specific buttons or switches while power is connected, but with extreme caution. Refer to your model’s service manual for precise instructions, as procedures vary.
Utilize the service position to manually run cycles, test sensors, and bypass safety features for troubleshooting. Always disconnect power before performing any physical repairs. Be aware that operating in service mode can override safety mechanisms, so exercise extreme care. Proper usage aids in accurate diagnosis and efficient repair, but improper use can cause damage or injury.
Resources and Further Help
For additional support beyond this manual, several resources are available. GE’s official website provides FAQs, parts diagrams, and contact information for authorized service technicians. Online forums dedicated to appliance repair, like Appliancepartspros.com, offer community-based troubleshooting and advice from experienced users. YouTube channels, such as Harper & Knowles, feature detailed repair guides and tutorials specifically for GE washers and dryers.
Consider consulting a qualified appliance repair professional for complex issues or if you’re uncomfortable performing repairs yourself. Always prioritize safety and follow manufacturer guidelines. Remember to have your model number readily available when seeking assistance, ensuring accurate information and part compatibility. Utilizing these resources empowers you to maintain your GE stackable unit effectively.
Comments (0)